-
-
Use the switch located on the right side of the tensile testing machine next to the power cord to turn the machine on.
-
-
-
Measure the width and thickness of your tensile samples at the center of the gage length to the nearest 0.1 mm with the calipers provided.
-
Use the provided figure as a guide to mark the boundaries of the gage length on your sample with the Sharpie pen.
-
Measure the distance between your marks to the nearest mm with the calipers.
-
-
-
Start the Bluehill 3 Tensile Testing Software.
-
The software will not initialize if the Instron Tensile Testing Machine is not switched on.
-
-
-
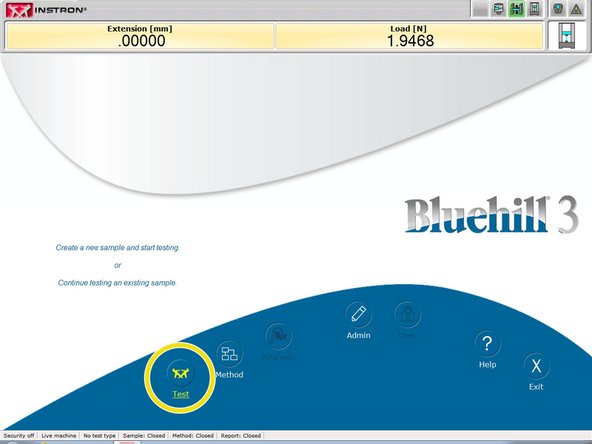
On the main screen, select the "Test" icon to initialize a new test.
-
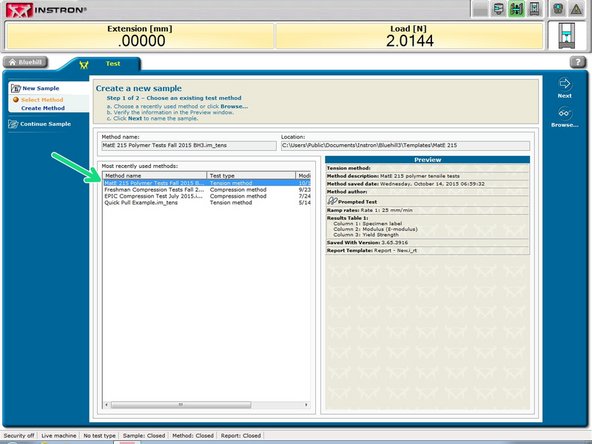
On the next screen, select the "MATE 215 polymer tensile tests" method name
-
-
-
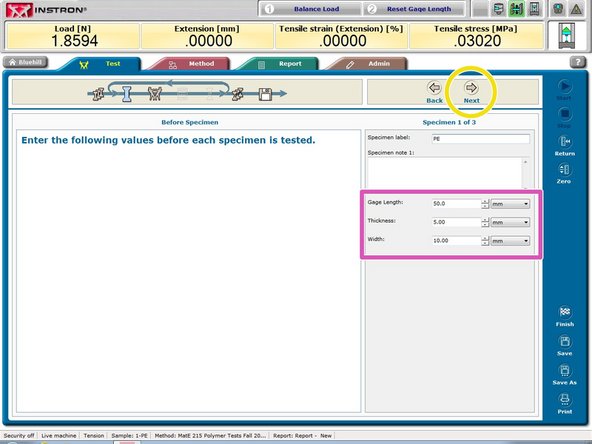
After entering the correct specimen label, input the dimensions of each sample.
-
Click next once you are finished entering dimensions for all three samples.
-
-
-
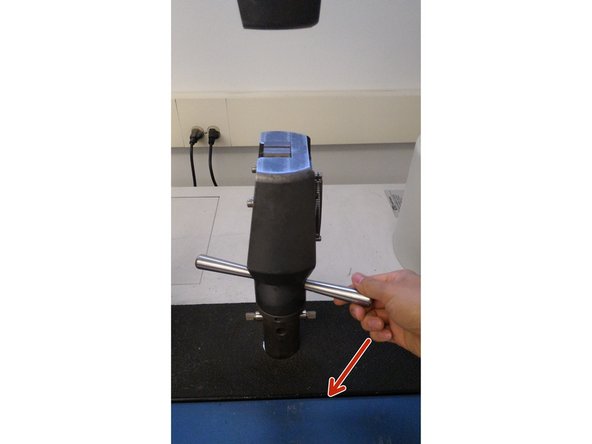
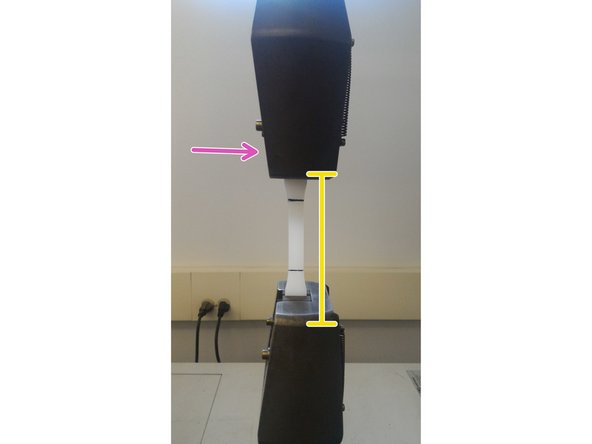
Use the control panel on the front of the machine to adjust the crosshead distance. The jaws should be close enough to grip each end of the sample.
-
-
-
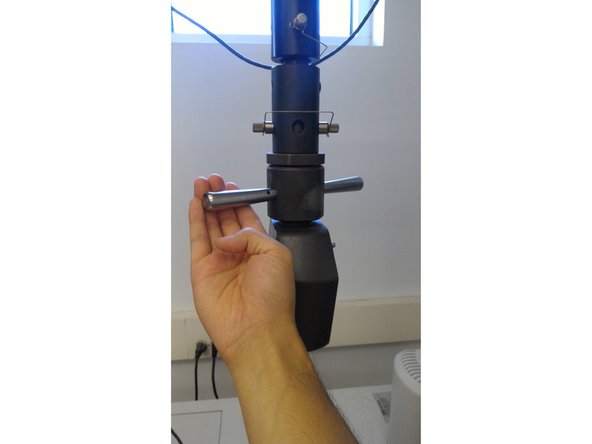
Loosen the lower jaw by turning the clamp clockwise.
-
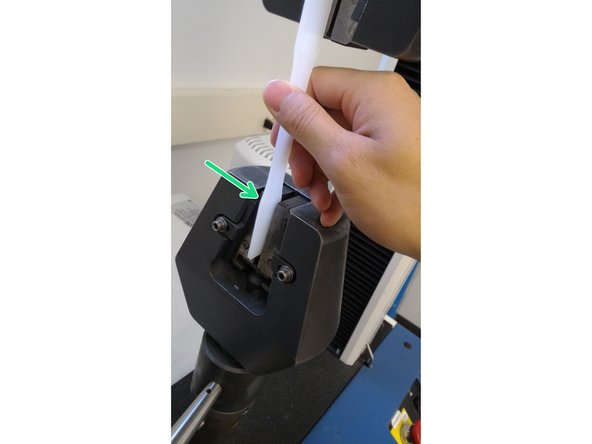
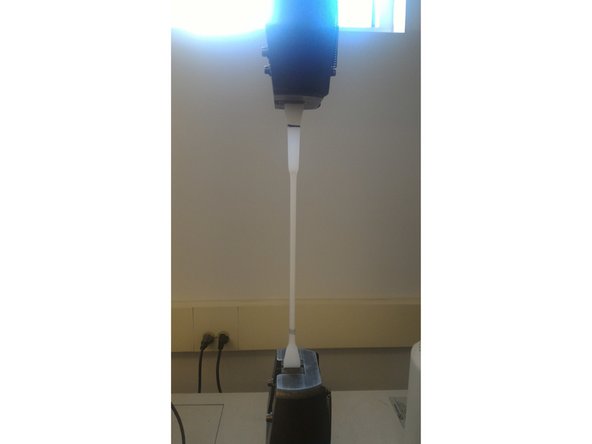
Place the sample into the jaw such that the edge of the grip section is just above the edge of top of the jaw.
-
Ensure that the sample is oriented vertically with the machine. Tighten the lower jaw by turning the clamp counter-clockwise "handtight."
-
Do not tighten past 90degree turn (i.e., 1/4 of a full turn) or you may damage specimen.
-
Repeat for the upper jaw. Adjust the crosshead if necessary.
-
Do not tighten past 90desgree turn (1/4th of a full turn) once the grips have clamped down on the sample.
-
-
-
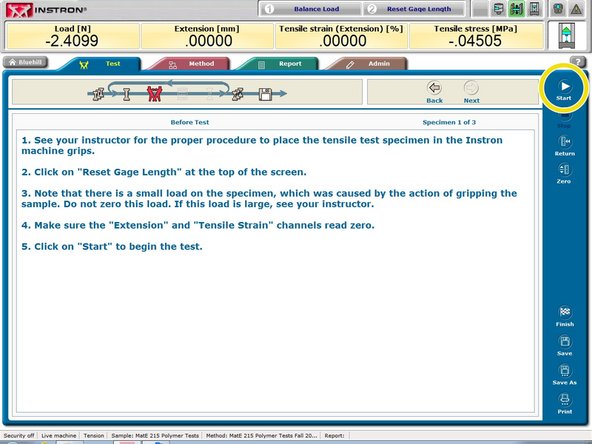
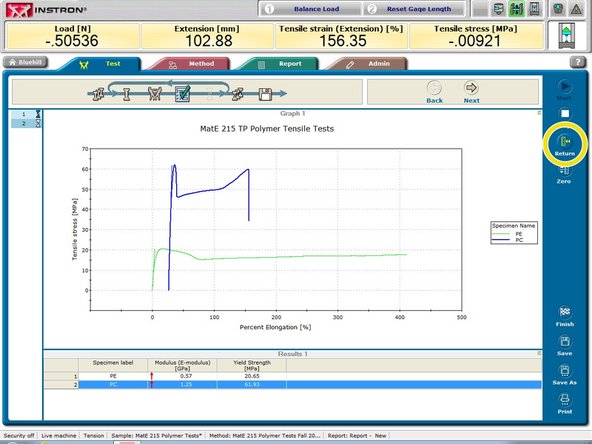
Click the "Start" button to begin the tensile test.
-
Wait for the machine to finish running the test.
-
-
-
When the test is complete, remove the sample from the jaws by turning the clamps counter-clockwise.
-
-
-
Press the "Return" button to reset the crosshead distance.
-
Return to step 7 and repeat the process for the remaining samples.
-