
Introduction
It is important to understand how the XRF gun is able to take compositional readings of samples. Knowing how the gun functions will give you a better understanding of the results.
-
-
Electronic excitation of the Rhodium target within the XRF-Gun produces a beam of x-rays directed towards the bulk material sample.
-
-
-
Pulling the trigger of the XRF gun generates an x-ray beam that is generated at the sample.
-
The x-ray beam penetrates the sample anywhere from 10-100μm into the surface.
-
-
-
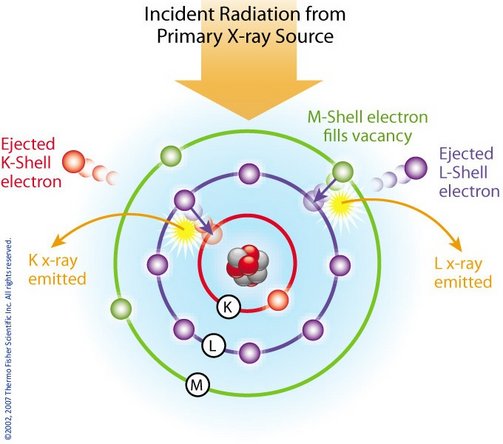
Due to the high energy of the x-ray beam, the atoms of the sample become excited.
-
This excitation causes inner shell electrons to eject from their orbitals (photoelectron production).
-
-
-
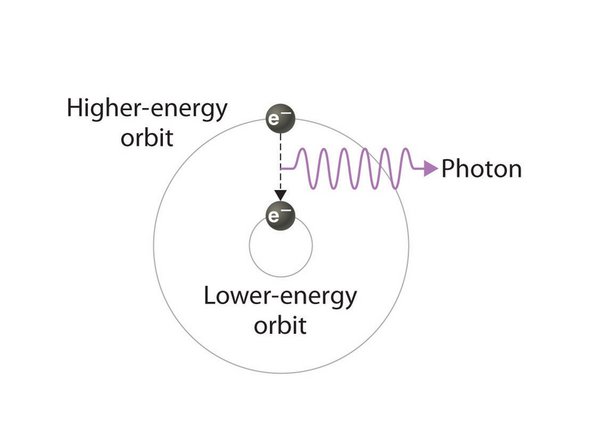
Upon returning to their relaxed state, the previously excited atoms release x-ray photons.
-
The energy of these photons correspond with electron energy differences present in the atoms.
-
The energy differences in each elements' atoms are unique and also known by the scientific community.
-
-
-
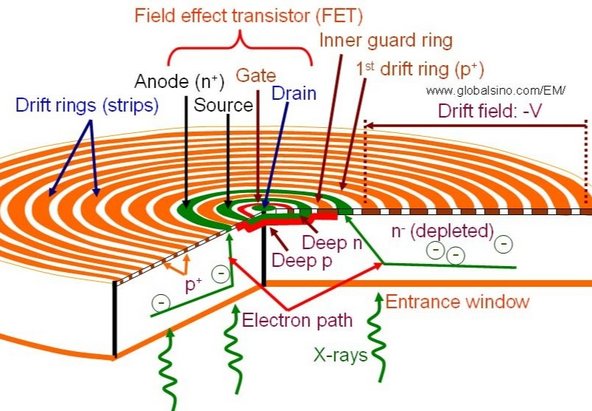
The XRF gun reads the energy levels of the x-ray photons using a Silicon Drift Detector (SDD).
-
When the photons enter the SDD they begin to form electron-pairs with the atoms inside.
-
The electrons and holes from this process are then collected by the oppositely charged walls of the SDD
-
The electronic programming of the SDD then counts these atoms and holes and records the energy levels of each one.
-
-
-
The data from this process is used to generate a plot displaying the photon beam intensity (y-axis) versus the energy of the photon beam (x-axis).
-
The energy levels are used to identify individual elements in the sample material and the intensity levels correspond with the total amount of the element present.
-
-
-
Along with the energy plot, the XRF gun will produce the numerical chemical composition of the sample (in weight percent).
-
-
-
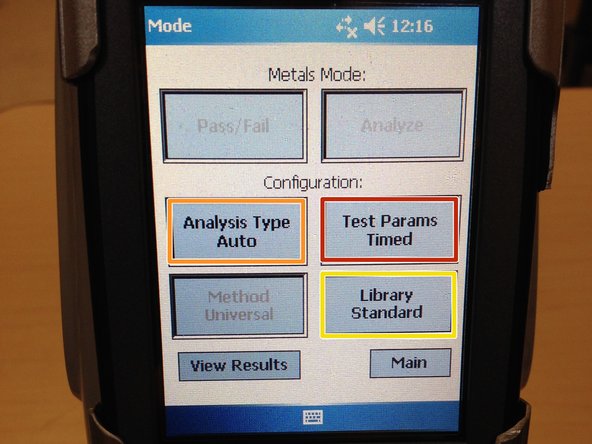
For both "Pass/Fail" and "Analysis" the Configuration settings should be set as follows:
-
Analysis Type - Auto
-
Test Params - Timed
-
Library - Standard
-
Click "here" to return to Step 6 of the "How To" guide.
-


Cancel: I did not complete this guide.
One other person completed this guide.
