Introduction
The steps in this guide need to be followed carefully in order to safely and properly conduct compositional analysis using the XRF.
-
-
Please read the Interpretation and Theory, Safety, and Sample Preparation guides before reading this guide.
-
-
-
Push the battery cartridge into the XRF gun as shown.
-
-
-
Turn on the HP iPAQ by pressing the power button.
-
A home screen should appear (as shown in the second picture).
-
-
-
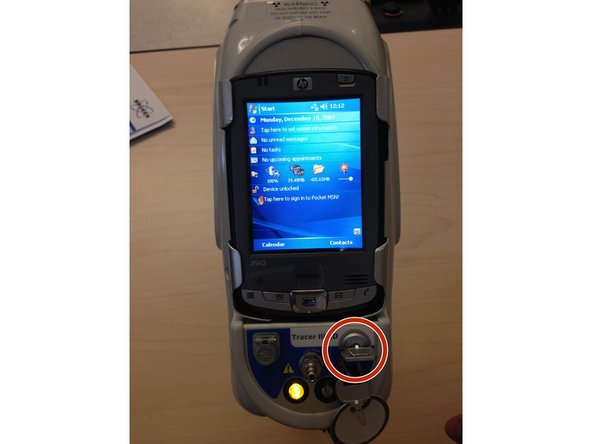
Insert key into slot and turn 90° to the right.
-
A yellow light should turn on.
-
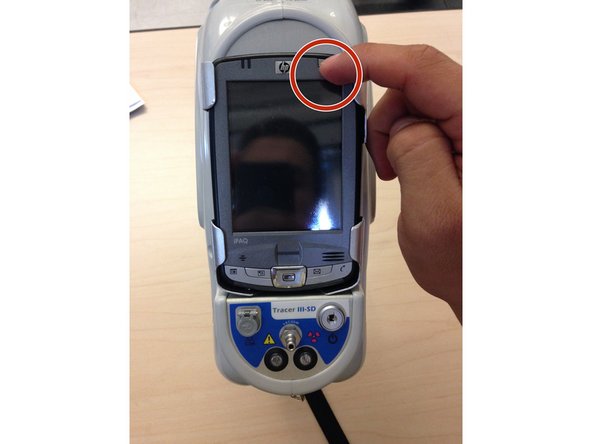
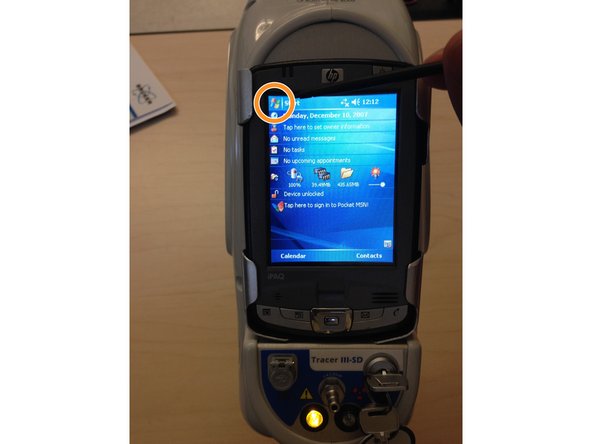
Press the Windows logo on the top left of the screen.
-
Press 'Bruker S1'
-
-
-
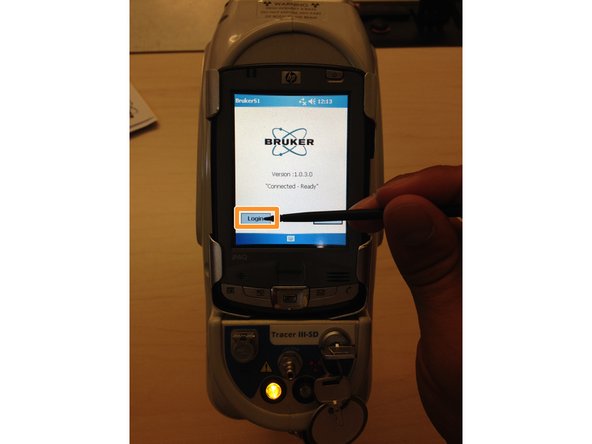
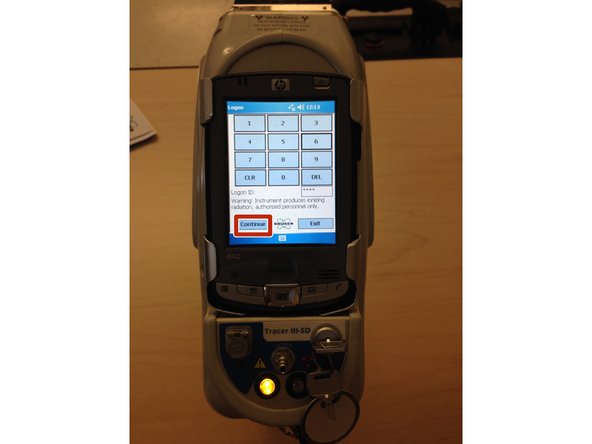
Press 'Login'
-
Enter the 4 digit password '1066'
-
Press 'Continue'
-
-
-
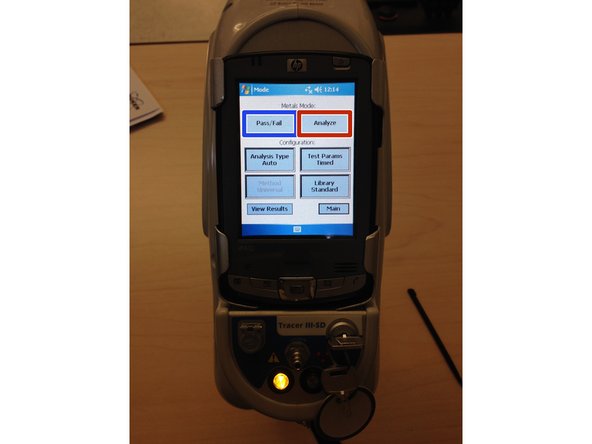
Here two different types of tests can be selected: "Pass/Fail" or "Analyze"
-
"Pass/Fail" will allow the sample to be compared to known metals in the database.
-
"Analyze" will simply read the composition of the sample and try to match it with a known metal.
-
Proceed to either "Pass/Fail" (Step 6) or "Analyze" (Step 8) depending on your analysis needs.
-
-
-
Check the Default Configuration step from Theory/Interpretation to ensure that the XRF settings are correct before proceeding to analysis.
-
-
-
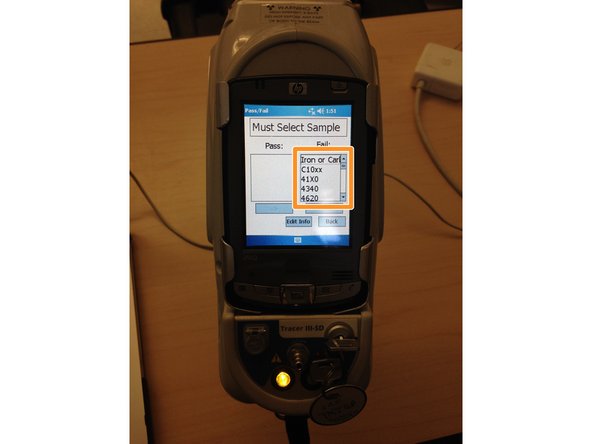
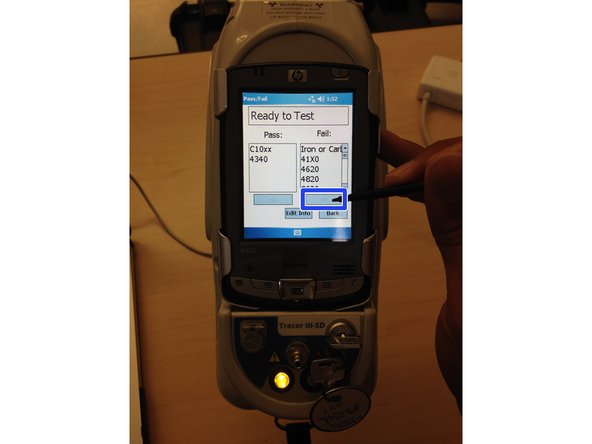
This option should be used when material confirmation is necessary.
-
Use the stylus to scroll through the list of known materials until the desired material(s) is found.
-
Select that material(s) by highlighting it with the stylus.
-
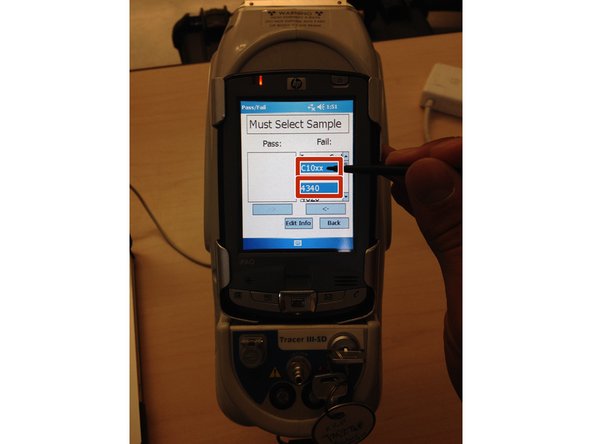
Next, press the left arrow key (<-) to input the selected metal from the 'Fail' column to the 'Pass' column. The sample will now be tested against this material to see if there is a composition match.
-
If an improper material is selected simply highlight it in the 'Pass' column and then press the right arrow key (->) to return it to the original 'Fail' column.
-
The screen should now display 'Ready to Test'. To find out how to initiate analysis please jump to (Step 8)
-
-
-
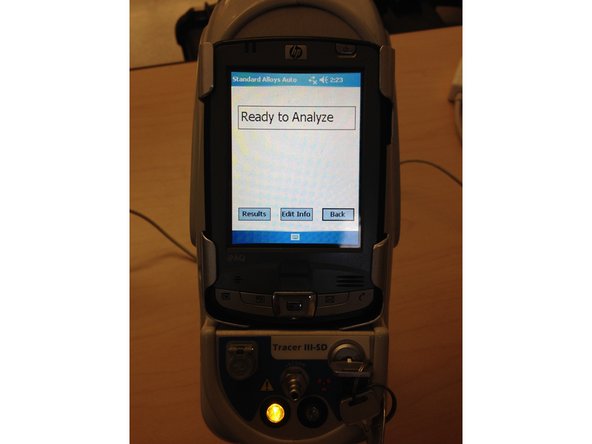
The "Analyze" option is good for identifying the exact composition of an unknown material.
-
If you have successfully selected the "Analyze" option you will see the "Ready to Analyze" screen. To see how to initiate analysis, proceed to (Step 8).
-
-
-
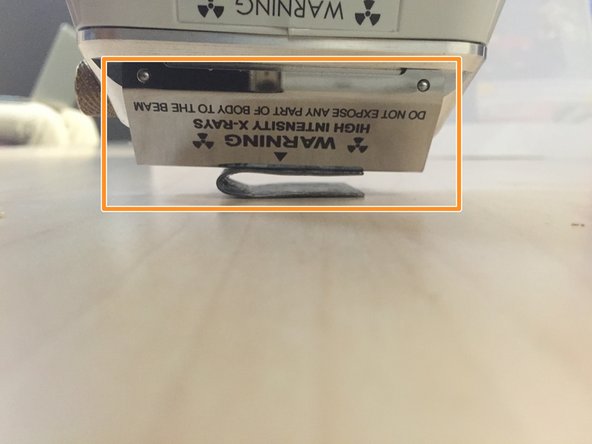
The XRF gun should now be pressed against the sample as shown.
-
Be sure that the sample covers the testing window.
-
Pull and hold the trigger to initiate analysis.
-
Be sure to keep the examination area clear.
-
The test will stop after 15 seconds; the trigger may be released before that if it is seen that a suitable composition reading has been determined.
-
-
-
Watch the Main Screen to view the composition results as they come in.
-
When satisfied with the reading, let go of the trigger to stop the analysis.
-
-
-
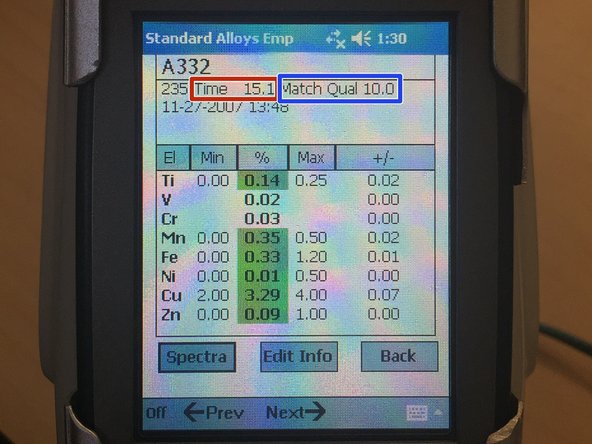
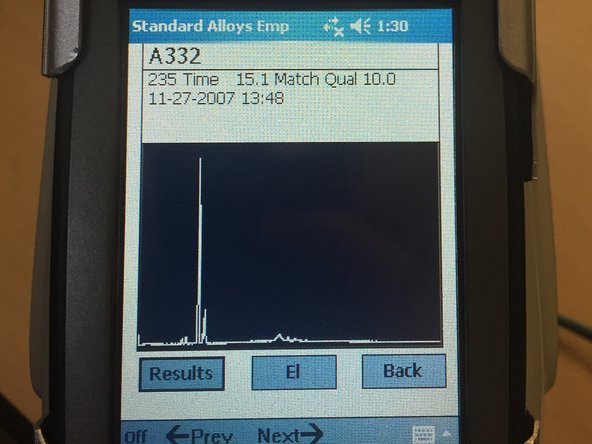
After analysis the composition screen will appear showing the results of the XRF analysis.
-
The longer the time of exposure (in seconds), the more accurate the results.
-
Match quality determines how accurately (on a 0.0-10.0 scale) the examined material matches a material in the database of the XRF.
-
For more information on the Spectrum plot, return to Step 6 of the "Interpretation and Theory" Guide.
-
For more information on the Composition Results, return to Step 7 of the "Interpretation and Theory" Guide.
-
If you analyze anything without a filter, you may see a large Ni peak - that is the metallic casing around the tube.
-